


- Premiere Tutotial
How to Use Slide and Slip Tools in Adobe Premiere and FilmoraPro

Jun 28,2019• Proven solutions
Adobe Premiere is one of the most popular apps for editing video, as it provides plenty of features and compatibility with various formats. Editors who want to tweak the timing of a clip in Premiere can use the slide and slip tool for easy adjustments.
It is a very handy feature that ensures that edits are more precise and quicker to complete. The slip and slide tools have separate purposes within Premiere, but both are vital to video editing within the program. Here is our guide on how to use the slide and slip tools within Adobe Premiere.
- Part 1: What are the Premiere Slide and Slip Tools
- Part 2: How to Use the Premiere Slide Tool
- Part 3: How to Use the Premiere Slip Tool
- Part 4: Alternative to Premiere slip and slide tool
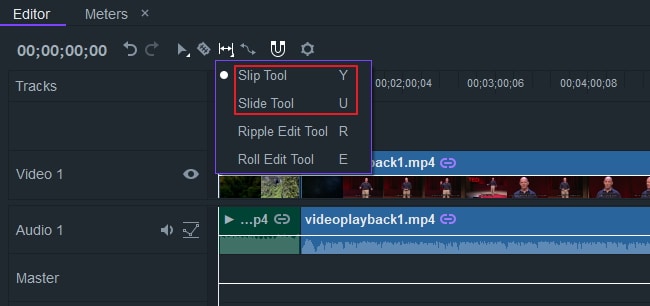
Part 1: What are the Premiere Slide and Slip Tools
1. Slide Tool
If you have a clip within your video and you want it to feature earlier or later within your sequence, you can use the slip tool to make it happen. The Slide Edit within Premiere will let you slide the clip up or down the timeline of your footage, allowing for a very easy adjustment.
Say there are three clips and you want to slide the one that is in the middle. You would take the clip that is in the middle and slide it up or down, with the other two clips adjusting accordingly.
The tool ensures that the duration of your target clip is always the same, while the durations of the other clips are adjusted accordingly. Depending on the adjustment, the duration of one clip may be increased, while another’s is reduced.
2. Slip Tool
The purpose of the slip tool is to let you simultaneously change the In and Out points of a clip within your timeline. You can make such an adjustment while leaving the time span between those points constant.
Take, for example, a ten second clip that you trimmed down to five seconds within your timeline. Now you can to determine which five seconds of the clip will show in the timeline. You can do that using the slip tool.
Perhaps you are attempting to complete a motion, such as a character coming in and out of the frame. Or you are attempting to match your action to another shot. The tool makes it easy to create such adjustments.
Part 2: How to Use the Premiere Slide Tool
If you want to make a slide edit, you are attempting to shift the clip in time and any adjacent clips are trimmed to ensure the move is a smooth one.
Say there is a set of footage and you want to move some of it forward or backward. All you would do is select those clips and then slide them to the left if you want to move them to the front. To the right if you want to move them further forward in the clip.
Pick the slide tool, position the pointer on the clip that you want to move and then draft it left so that it is before the intended clips in your sequence. As your mouse moves and the process is completed, the program will complete any adjustments to the other clips that are a part of your sequence.

Besides, you can also use shortcut to slide footage. Press Alt+, on Windows to slide left one frame, and press Alt+. on Windows to slide right one frame.

Here is more information about slide tool.
Part 3: How to Use the Premiere Slip Tool
If you want to change the starting and ending frames of a clip without adjusting its duration, you can use the Premiere slip tool. It will adjust the clip’s In and Out points forward or backward by the same amount of frames, using one action.
To begin the process, select the slip tool on Premiere and then position your pointer on the clip(s) that you want to adjust. Drag the clips left if you want to move the In and Out points later within the clip, while a move rightward will move the In and Out points earlier within the clip.
The program will update the source In and Out points of the clip, showing you the result on the monitor and maintaining the duration of the clip.

As usual, you can use shortcut to slip video clips easily. Press Alt+Shift+Left on Windows to slip video left one frame, and press Alt+Shift+Right on Windows to slip video right one frame. Below is the shortcuts table for your reference.

Part 4: Alternative to Premiere slip and slide tool
If you have just outgrown from basic video editing, and feel Premiere is too difficult to use, why not to choose FilmoraPro? It is designed for semi-pros or pros who want to enter a new level video editing experience. The slip and slide tool in FimoraPro is intuitive to use. The video and word tutorials are updated regularly. You can easily start editing videos like a pro. Download it now to have a try (Free)!


How to use slip and slide tool in FilmoraPro easily
Use slip tool in FilmoraPro: In the editor panel, click slip tool at top. You can also hit Y to bring it up, and drag the clip to left or right until you get what you want.
Use slide tool in FilmoraPro: In the editor panel, click slip tool at first and select slide tool. You can also hit U to bring up the slide tool in FilmoraPro, and drag the clip to left or right. Here is a shortcut table of FilmoraPro.
You see, it is much more easier to use than Premiere. You can also merge audio/video and use ripple/roll editing tools.
Conclusion
Now that you have a complete understanding of how to use the slip and slide tools in Adobe Premiere, you will have a much easier time adjusting your footage. Changing where a clip is located within the timeline, or adjusting the In and Out points of a clip, will be a much simpler process.
Bring up your video to a professional level with straightforward tools.
Try It Free Try It Free
Liza Brown
chief Editor
0 Comment(s)